




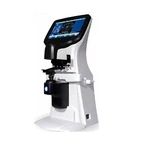

(1) Operation steps of semi-automatic edging machine
1. Clamping operation of templates and lenses
(1) Turn on the power switch, and the automatic edger is in a standby state.
(2) Install the appropriate template on the left template shaft. When installing, the indicator hole on the upper side of the template is aligned with the red dot mark on the shaft. After confirming that the left and right are correct, insert the two
On the positioning pin, fix it with a gland.
(3) Insert the lens with the rubber vacuum suction cup determined by the centering instrument into the keyway of the lens shaft. When installing, the red dot mark on the copper seat of the rubber vacuum suction cup is the same as the red mark on the shaft.
Align the point marks, manually or motorized, make the rubber top block on the lens clamping shaft clamp the concave surface of the lens to be processed. When clamping manually, the clamping force should be moderate and too large.
The lens is easy to be cracked, too small, and the lens is easy to slip during grinding.
2. The setting operation of lens material. At present, most automatic edgers have lens material (optical glass, optical plastic) selection buttons to ensure the grinding quality and efficiency.
The selection is made according to the material of the processed lens during operation.
3. The adjustment operation of the lens processing size is based on the size of the dry horizontal plate, the slightly smaller groove of the frame and the wear and tear of the grinding wheel, so the processing size of the lens is set to be slightly larger than that of the horizontal plate.
Needs to be fine-tuned based on experience.
(1) When processing optical glass lenses
Metal frame: +0.3~+0.5mm.
Plastic frame: +0.8~+1.0mm.
(2) When processing optical plastic lenses
Metal frame: +0.8~+1.0.
Plastic frame: +1.3.
(3) About: +1.8mm when grinding the flat edge.
4. Adjustment of grinding pressure The grinding pressure has been adjusted before leaving the factory, and you can choose an optimal value according to the instructions for use during operation.
5. Adjustment operation of chamfer type and position
(1) During operation, select the sharp-edged or flat-edged button according to frame, frameless, or half-frame.
(2) According to the thickness of the periphery of the lens, set the position of the sharp corners on the periphery, some automatic edgers can automatically judge, no need to set.
6. Setting operation of processing sequence If you want to carry out automatic edging sequence: rough grinding → fine grinding → chamfering edge (flat edge), select the linkage switch. Otherwise, choose a single action switch.
7. Edge grinding start operation After clamping the template and lens, close the protective cover, do all the predetermined adjustment work, and the main manual operation stage of automatic edge grinding is over. Press the edging start button switch.
With computer-controlled copying automatic edging machine, after pressing the start button, the swing frame will automatically move to the rough grinding area, and it will descend to start grinding. GS-75 automatic edging machine slightly lift the swing frame handle to the left and lower the swing frame so that the rough grinding position adjustment positioning pin enters the guide groove, so as to control the axial position of the swing frame, when the periphery of the lens is in the rough grinding area of the grinding wheel Grind.
8. Monitor the automatic edging process After starting, the lens is driven down by the swing frame to contact with the edging grinding wheel for grinding, and the lens shaft rotates at a low speed.
After touch, the lens shafts are ground in sequence in reverse order (one forward and one reverse) to reduce idle travel and improve edge grinding efficiency.
After the lens is basically formed, the lens axis continuously rotates in one direction to perform light knife finishing. After the light knife is completed, the swing frame automatically lifts up to make the lens separate from the grinding wheel, and automatically moves to the top of the grinding wheel to form a chamfered V-shaped groove, and then automatically downwards. Bring the lens into chamfer grinding.
Rough chamfering is performed first, and the lens axis rotates intermittently in one direction. When the V-shaped sharp edge is basically completed, the lens axis continuously rotates in one direction to perform chamfering finishing. After the whole process of edging, the swing frame is automatically lifted. , so that the lens is separated from the V-shaped groove of the grinding wheel, and moved to the original position to the right, and the edger will automatically shut down and stop.
9. Remove the lens, operate at a safe inclination angle, and after the automatic edging is completed, open the protective cover, press the release button or loosen the clamping block, remove the lens, and align the convex and concave edges of the lens on the hand grinding machine. Pour out a safety chamfer with a width of about 0.5mm and an angle of about 30°.
(2) Other work steps
1. Invert the safety corner.
2. Polished.
3. Assembly.
4. Shaping.