




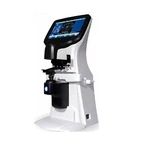

The operation steps of the automatic edging machine:
1. When using the water tank to supply circulating water, please replace the processing water after processing every day, so as to avoid the blockage of the water pipe caused by the dirt in the water tank.
2. When changing the water, please unplug the power plug first, then take out the water tank, pour out the waste water, and clean the dust in the water tank and the filter net.
3. When the resin sheet is processed, a large amount of foam will be generated in the water tank. When changing the processing water, add defoamer and spray 7~10 times. Defoamers remove foam from plastic flakes. When there are too many bubbles, you can directly aim at the bubbles and spray 2~3 times, and the effect is better after stirring.
4. Clean the spout.
Once the water jet is blocked, the amount of water is reduced or there is no water, resulting in reduced processing capacity or even inoperability. When cleaning the water jet, please unplug the nozzle and use a fine needle to clear the blockage inside the nozzle.
5. Clean the waterproof cover of the edger.
Working for a long time will cause the cutting dust of the lens to adhere to the waterproof cover. If it is not cleaned in time, the cutting dust will solidify and be difficult to remove. This affects the sight line of sight. Wash with a brush and water spray container at the end of each day's processing.
6. Clean the edging room.
Long-term processing will cause cutting dust to adhere to the clamping shaft, chuck and the inner wall of the edging chamber. If it is not removed in time, the lens will be scratched, and the sealing ring of the clamping shaft will be worn, resulting in water entering the machine head. There are two cleaning methods as follows: (1) Direct cleaning with a brush and a water spray container. (2) Enter the machine cleaning mode to clean. This method can also clean the water supply pipeline inside the machine. For specific steps, please refer to the accompanying operating instructions.
7. Clean the edger and scanner housing.
After using the machine every day, it must be cleaned immediately. If you leave it for a few days and then clean it, the cutting powder will solidify on the casing and will be difficult to remove. Clean the case with a soft cloth dampened with a mild detergent.
8. Dress the grinding wheel.
When the grinding wheel is dull, the machining time becomes longer. In order to restore the performance of the grinding wheel, it should be trimmed (after grinding about 1000 pieces of glass). Methods as below:
(1) Direct trimming
1) Wet the sand bar. 2) Power on. 3) Scan the frame, after sending the data, start the machine for edging (without clipping the lens). 4) After the nose drops, turn off the machine. 5) Rely on the inertia of the grinding wheel, press the repairing stone rod, and repair it 4 to 5 times.
(2) Enter the grinding wheel dressing mode
1) Enter the menu. 2) Select the grinding wheel dressing mode. 3) Start the machine. 4) Rely on the inertia of the grinding wheel, press the dressing rod up, and dress it up. 5) Start once, and the grinding wheel runs for a few seconds, so that it can be trimmed 4 to 5 times.
9. For the edger that moves the machine head up and down by the support rod, you can also add a little bit of clock lubricating oil to the support rod regularly.